Slider
The completed code for this game is available here.
Slider takes its inspiration from the classic 4 x 4 grid slider puzzles. The grid has a single empty slot and the direction pad is used to move an adjacent block into the empty space.
Controls D pad - slide blocks A button - automatically solve puzzle B button - mix the puzzle
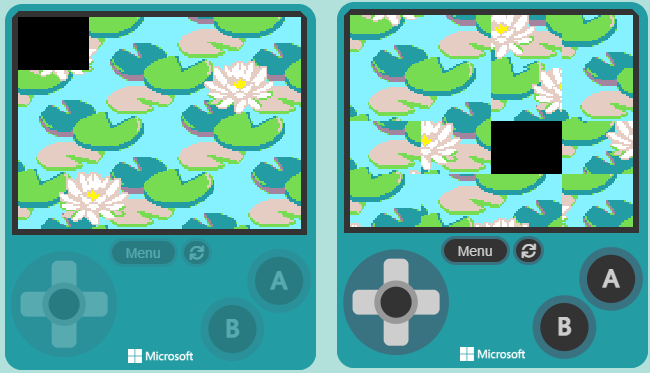
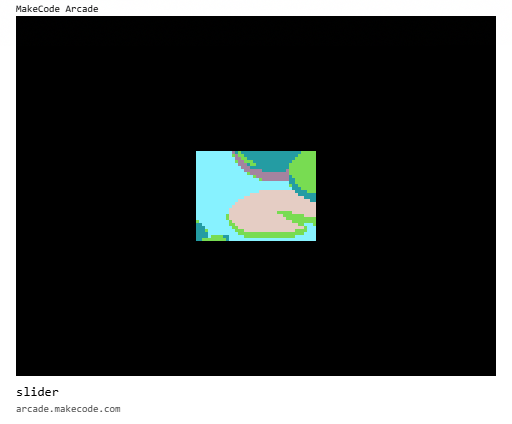
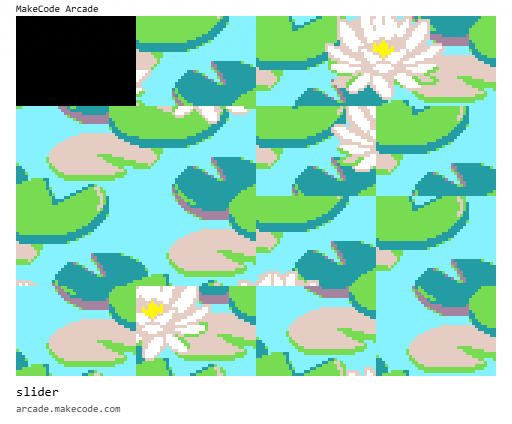
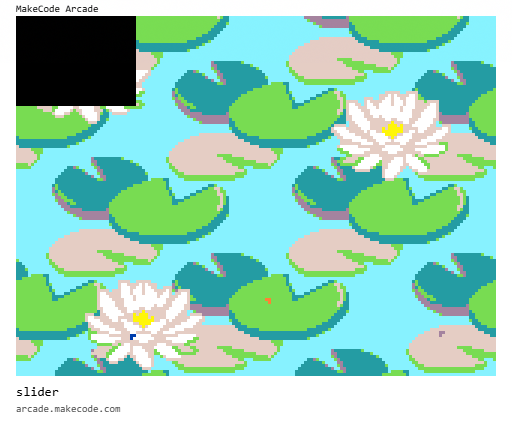
Slider takes its inspiration from the classic 4 x 4 grid slider puzzles that are common in party bags and great fun for wasting away 10 minutes or so on a lazy sunday afternoon. Examples of these types of puzzle can easily be found on your favourite online shopping sites such as Baker Ross or even Amazon. The example screen shots below show the game at start up as well as shuffled.
NOTE: This game is used as a basis for one of the puzzles in the Escape room.
Learning outcome
New concept introduced: Arrays
This project will typically take 1 to 2 hours to complete, depending on how much time is spent on designing the slider picture. Expect to spend at least an hour on the coding part.
Whilst the amount of coding required is only modest, this project makes extensive use of arrays which are a new concept introduced in this project. Ensure to allow time to each the accompanying notes.
The following blocks and concepts are used in this project:
Step 1 - Create a new game
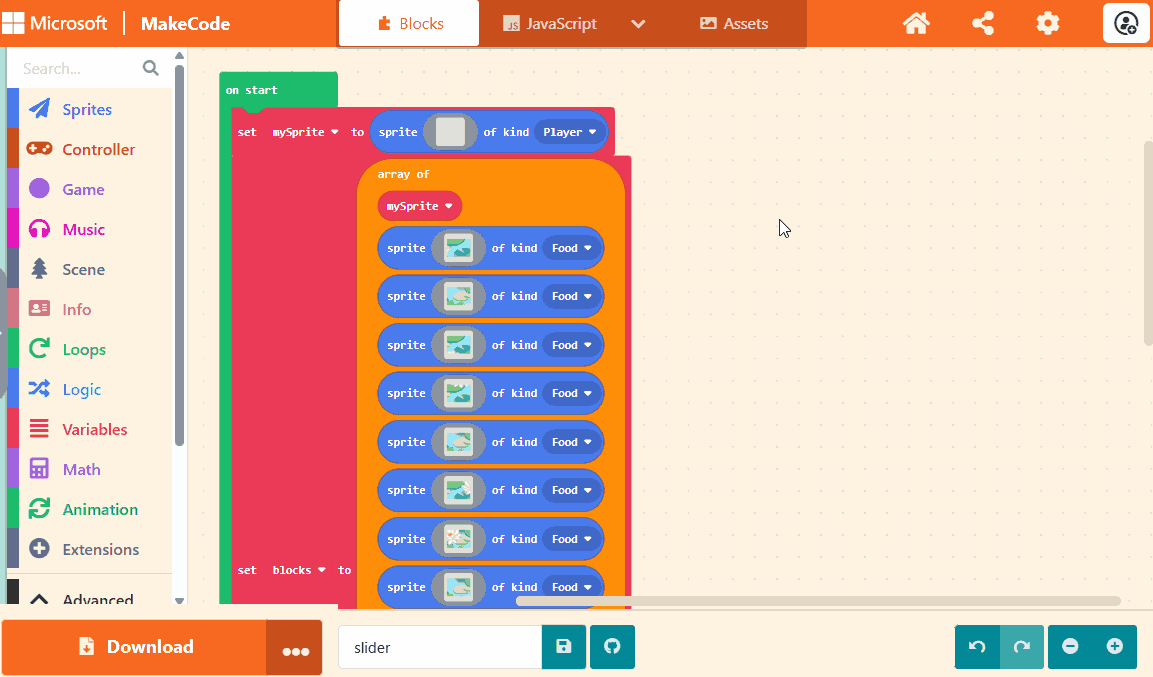
Navigate to the MakeCode Arcade website at the following address https://arcade.makecode.com and create a new project called slider as shown below:

Step 2 - Create the picture
NOTE: If you want to make a slider puzzle that uses distinct pictures for the blocks (such as numbers or letters), you can skip steps 2 and 3. Instead, create 15 40 x 30 pixel images and draw each of the individual pictures in each of them. Once done, go straight to step 4.
The screen size of a MakeCode Arcade device is 160 pixels across by 120 pixels high. Therefore the picture to use for the puzzle also needs to be 160 x 120 pixels. There are two approaches for choosing a picture to use, both of which are described below:
Approach 1: Selecting a picture from the gallery
Picking a background from the gallery is the quickest way to get started. If you take this approach, make sure you select a picture that is 160 x 120 pixels.
To select a picture from the gallery:
- Click the Assets tab from the the top of the screen
- Click the Gallery tab
- Select a picture from the gallery
- Check the pictures size is 160 x 120 pixels (size is given in the asset preview)
- Click duplicate
The below animated image illustrates the steps above.
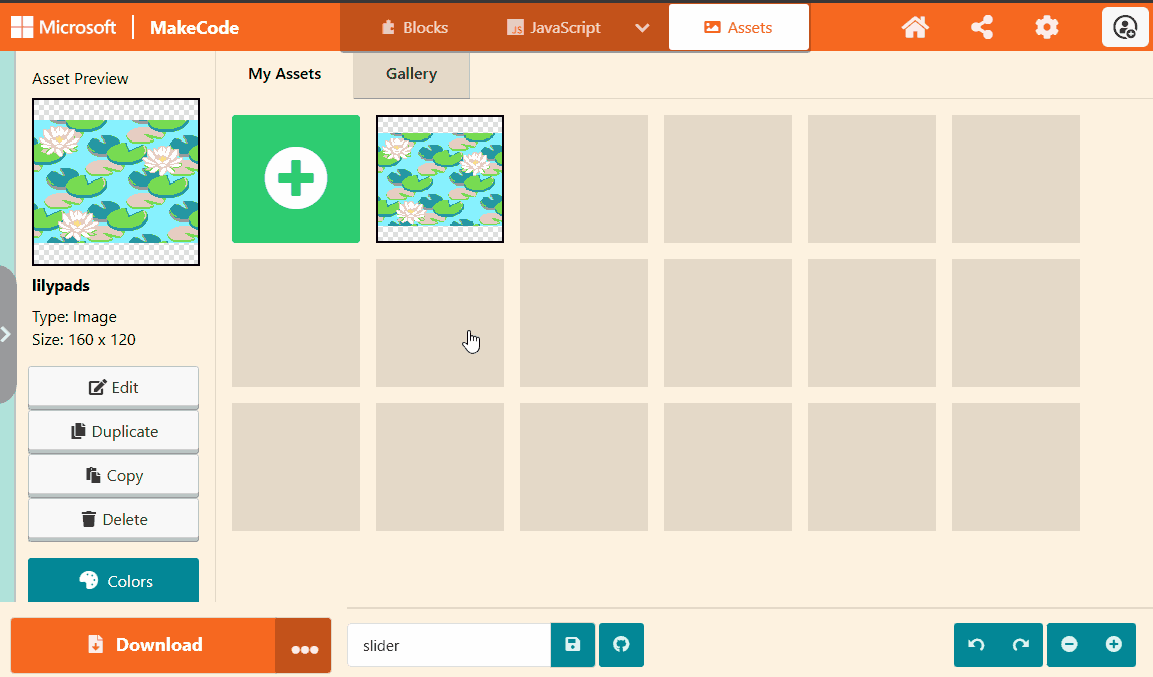
Approach 2: Drawing your own picture
Drawing your own picture allows your to exercise your own artistic talent and creative flair. It also allows you to make your game completely unique.
To create your own image:
- Click the Assets tab from the the top of the screen
- Click the + icon
- Click the image icon to create a new image
- Change the size to 160 x 120 pixels
- Change the name to
background - Draw the picture
- Click Done
The below animated image illustrates the steps above.
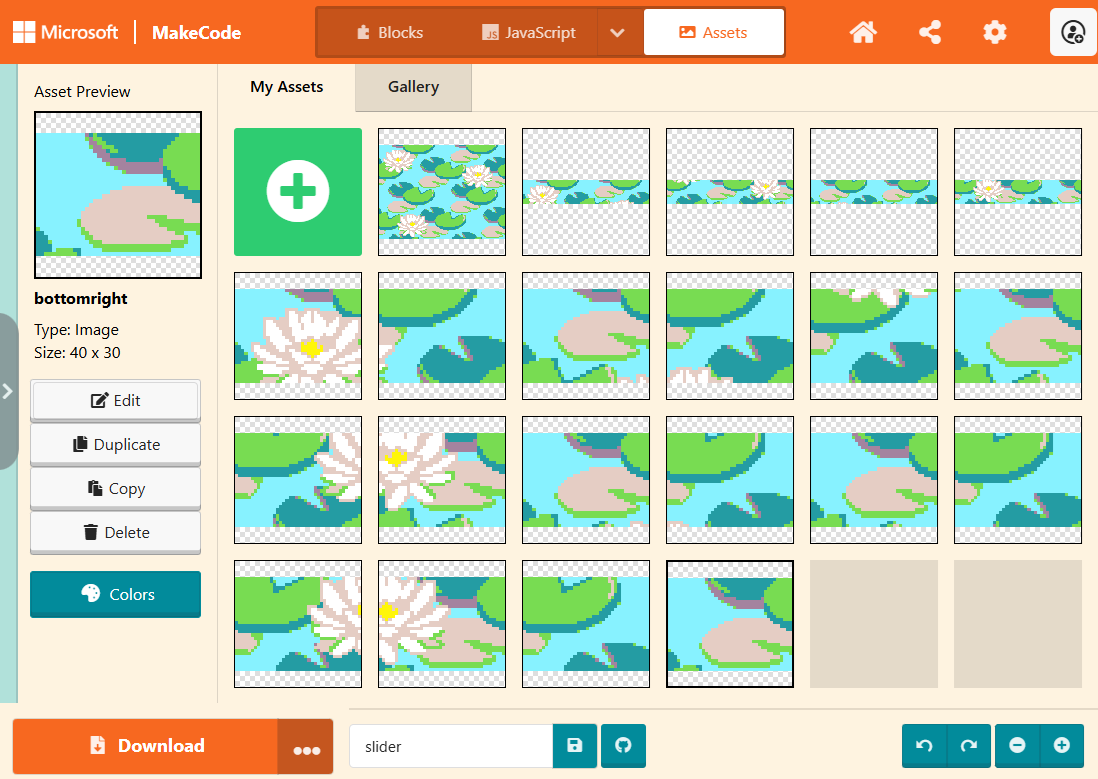
Step 3 - Splitting the image into blocks
The completed code for this step is available here.
Now you have a background picture that is the same size as the screen of the MakeCode Arcade device. The next task is to split the picture into a 4 x 4 grid. As the picture is 160 x 120 pixels, splitting this into a 4 x 4 grid will result in 16 blocks that are each 40 pixels wide by 30 pixels high.
Splitting the background picture is quite simple and mechanical. First you will break the image into 4 rows, each 160 pixels wide and 30 pixels high. You will then break each row into 4 blocks, each 40 pixels wide. Once finished you will have something that looks a little like this (your picture will vary).
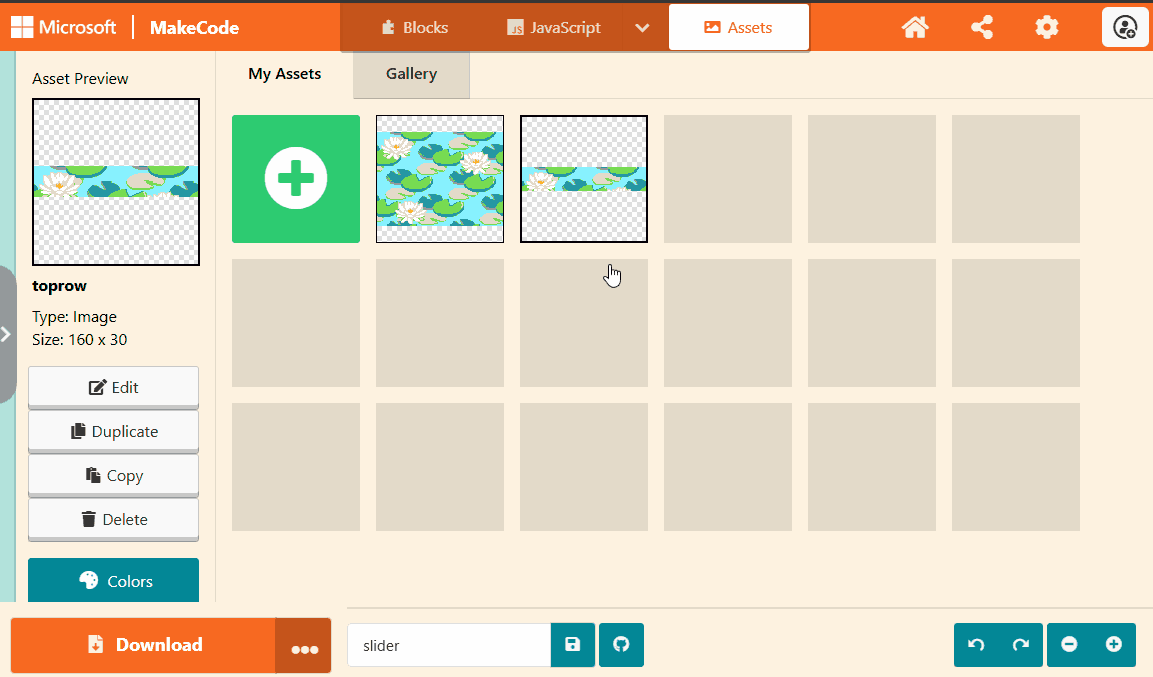
Top row
To extract the top row of the image, follow these steps:
- Click the Assets tab from the the top of the screen
- Select the background picture
- Click the Duplicate button from the asset preview on the left hand side
- Select the duplicated image
- Click the Edit button
- Change the height of the image to 30
- Change the name to
toprow - Click Done
The below animated image illustrates the steps above.
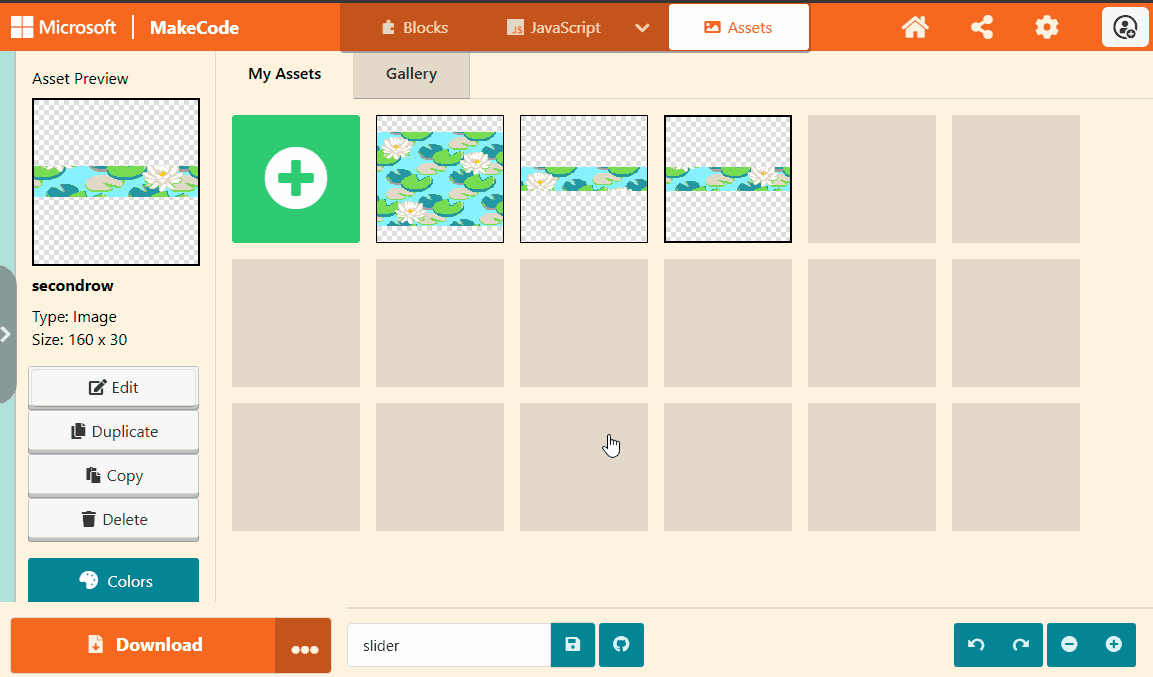
Second row
To extract the second row of the image, follow these steps:
- Click the Assets tab from the the top of the screen
- Select the background picture
- Click the Duplicate button from the asset preview on the left hand side
- Select the duplicated image
- Click the Edit button
- Change the height of the image to 60
- Change the name to
secondrow - Click the mirror vertically button
- Change the height of the image to 30
- Click the mirror vertically button
- Click Done
The below animated image illustrates the steps above.
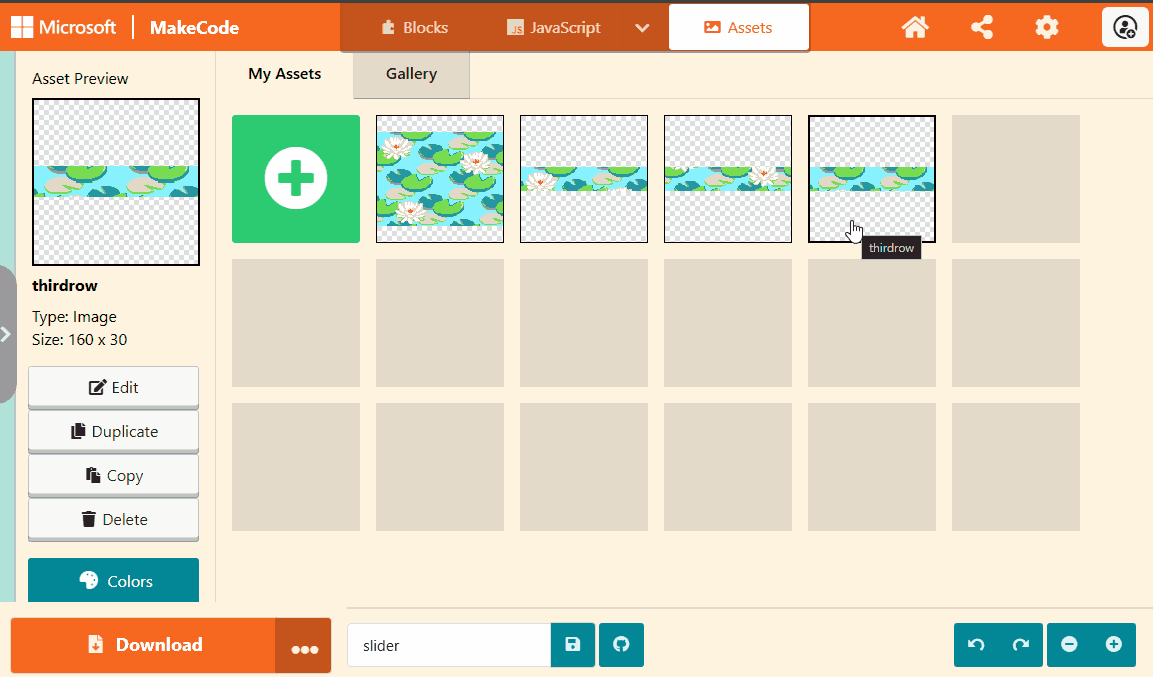
Third row
To extract the third row of the image, follow these steps:
- Click the Assets tab from the the top of the screen
- Select the background picture
- Click the Duplicate button from the asset preview on the left hand side
- Select the duplicated image
- Click the Edit button
- Change the height of the image to 90
- Change the name to
thirdrow - Click the mirror vertically button
- Change the height of the image to 30
- Click the mirror vertically button
- Click Done
The below animated image illustrates the steps above.
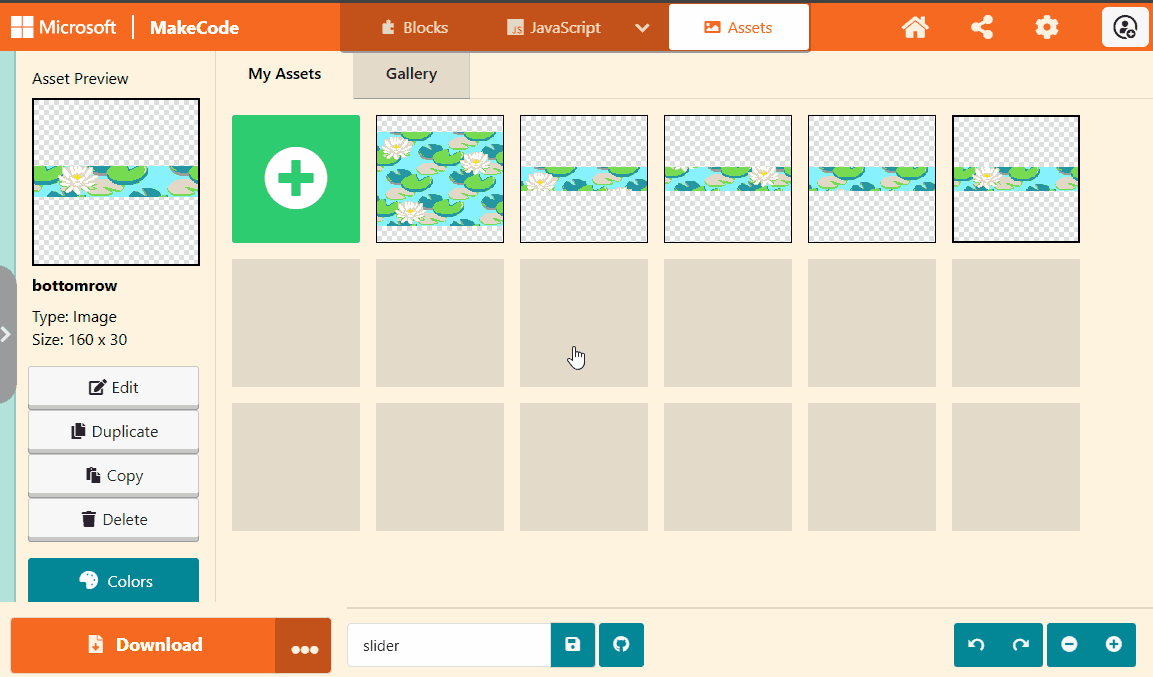
Bottom row
To extract the bottom row of the image, follow these steps:
- Click the Assets tab from the the top of the screen
- Select the background picture
- Click the Duplicate button from the asset preview on the left hand side
- Select the duplicated image
- Click the Edit button
- Click the mirror vertically button
- Change the height of the image to 30
- Change the name to
bottomrow - Click the mirror vertically button
- Click Done
The below animated image illustrates the steps above.
Splitting to blocks
Each row now needs to be split into 4 blocks. This is very similar to splitting by rows, just horizontally. We will do it here for the top row but each of the other rows are the same.
Left block
To extract the left block of a row, follow these steps:
- Click the Assets tab from the the top of the screen
- Select the
toprowpicture - Click the Duplicate button from the asset preview on the left hand side
- Select the duplicated image
- Click the Edit button
- Change the width of the image to 40
- Change the name to
topleft - Click Done
The below animated image illustrates the steps above.
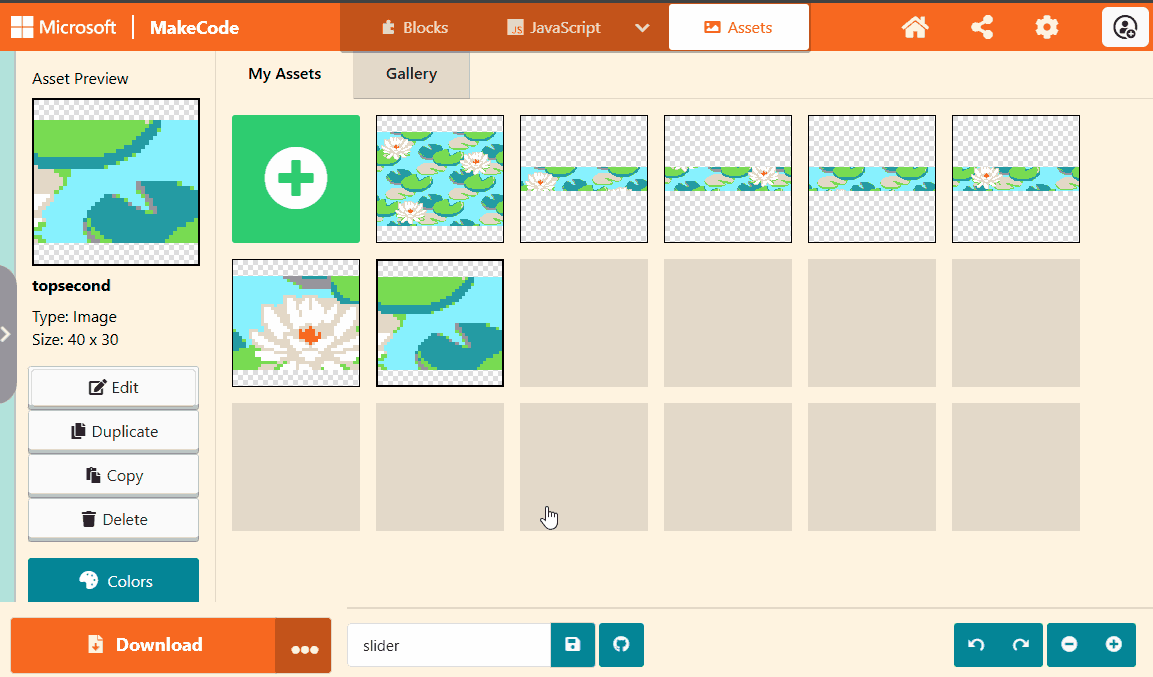
Second block
To extract the second block of a row, follow these steps:
- Click the Assets tab from the the top of the screen
- Select the
toprowpicture - Click the Duplicate button from the asset preview on the left hand side
- Select the duplicated image
- Click the Edit button
- Change the width of the image to 80
- Change the name to
topsecond - Click the mirror horizontally button
- Change the width of the image to 40
- Click the mirror horizontally button
- Click Done
The below animated image illustrates the steps above.

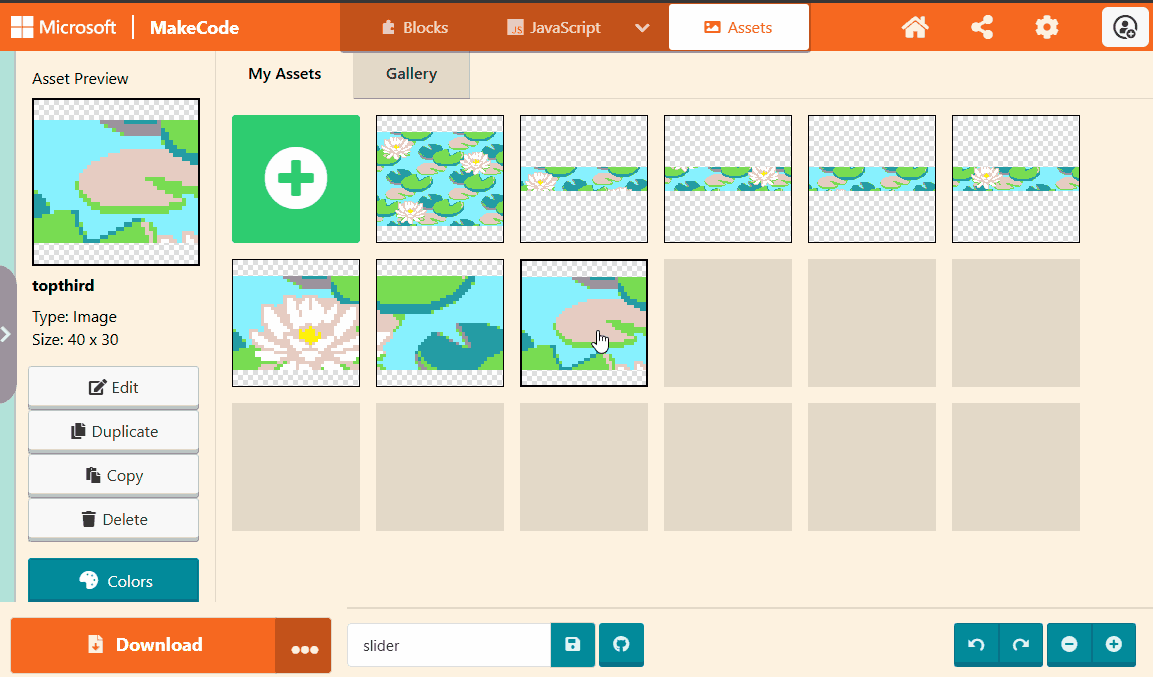
Third block
To extract the third block of a row, follow these steps:
- Click the Assets tab from the the top of the screen
- Select the
toprowpicture - Click the Duplicate button from the asset preview on the left hand side
- Select the duplicated image
- Click the Edit button
- Change the width of the image to 120
- Change the name to
topthird - Click the mirror horizontally button
- Change the width of the image to 40
- Click the mirror horizontally button
- Click Done
The below animated image illustrates the steps above.
Right block
To extract the right block of a row, follow these steps:
- Click the Assets tab from the the top of the screen
- Select the
toprowpicture - Click the Duplicate button from the asset preview on the left hand side
- Select the duplicated image
- Click the Edit button
- Click the mirror horizontally button
- Change the width of the image to 40
- Change the name to
topright - Click the mirror horizontally button
- Click Done
The below animated image illustrates the steps above.
Step 4 - Creating the sprite blocks
The completed code for this step is available here.
In this step, we will create the 16 sprites that represent the 16 blocks of the 4 x 4 grid.
One of the sprites will be the marker that is used to indicate the empty grid space. The
other 15 sprites will be the blocks from the picture created in the earlier steps except
for the top left block which is where the marker will be. The marker sprite can be left
blank as in this example or you can colour it in or draw a picture.
At the end of this step you will have 16 sprites that are each stack on top of each other and look like the image below. The sprites are stacked as they all have a default position which is the centre of the screen. Step 5 will position the sprites correctly.
![]()
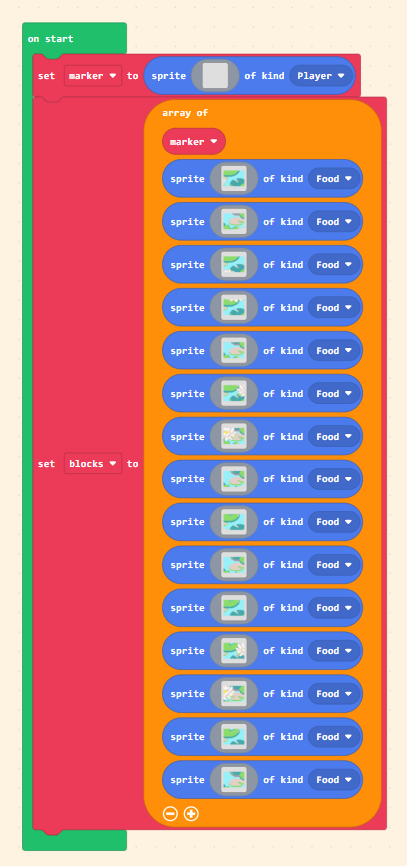
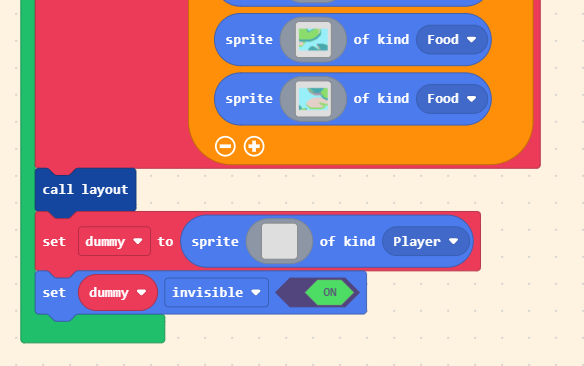
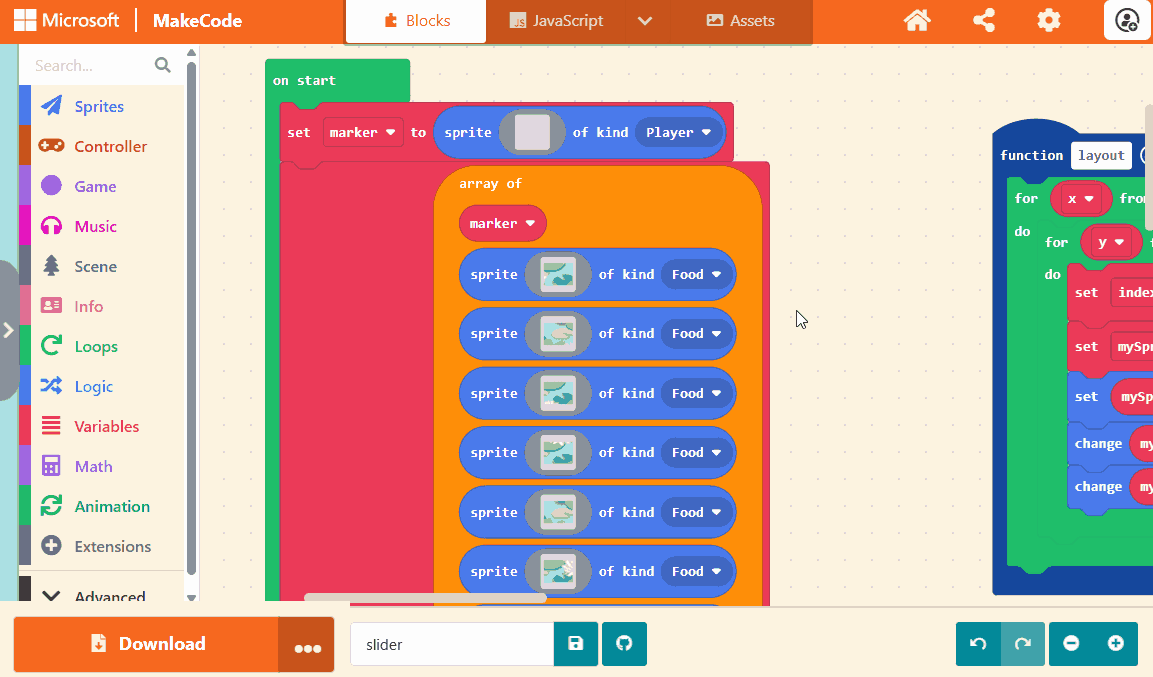
The completed code is given at the end of this step. First, create the marker sprite
and the blocks array following these steps:
- Create a new sprite and rename it to
marker. This should be of typePlayer - Create a new variable called
blocks - Make the
blocksvariable an array. You can read more about arrays here - Add the
markervariable to the array - Add 15 sprites to the array of type
Food
The below animated image illustrates the steps above, the completed code can be found at the end of this step.

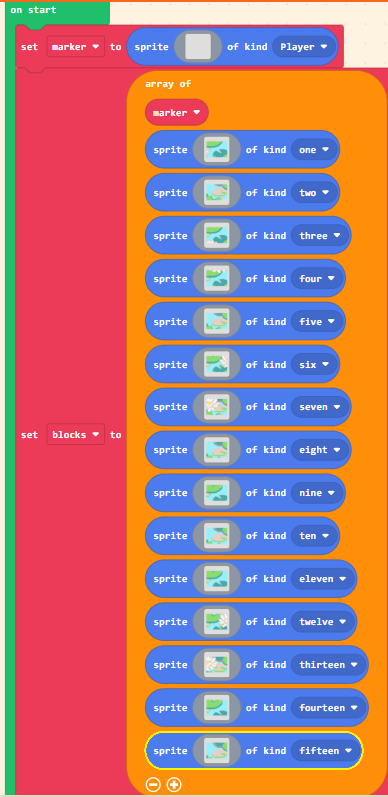
You will now have an array containing 16 items, the marker variable and 15 sprites of
type Food. These 16 items represent the 16 blocks of the 4 x 4 grid with the marker
being the blank space in the top left corner of the grid. Each sprite should be given
an image from those split out from the picture you drew or selected earlier. The images
should be assigned to the sprites in the correct order so when laid out they correctly
form the picture. The images should be selected in the order of the rows (top to bottom)
and order of the blocks within each row (left to right). The exception is the left most
image of the top row. This should be ignored as the marker is used instead. The diagram
below shows the order the images should be selected based on where they are in the grid.
![]()
An image can be selected by following these steps:
- Clicking on the sprite image
- Selecting My Assets
- Selecting the desired image
The completed code:
Where are all the sprites?
When you run your program now, where are the sprites? Why do you think this is?
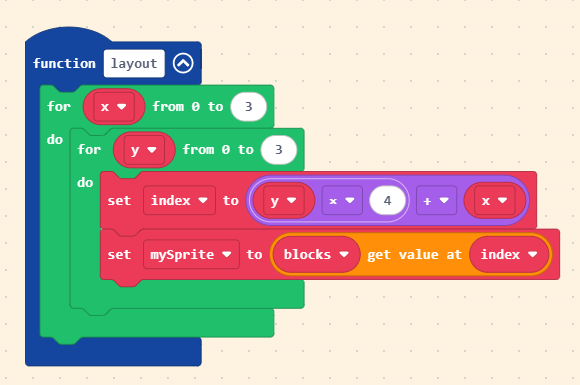
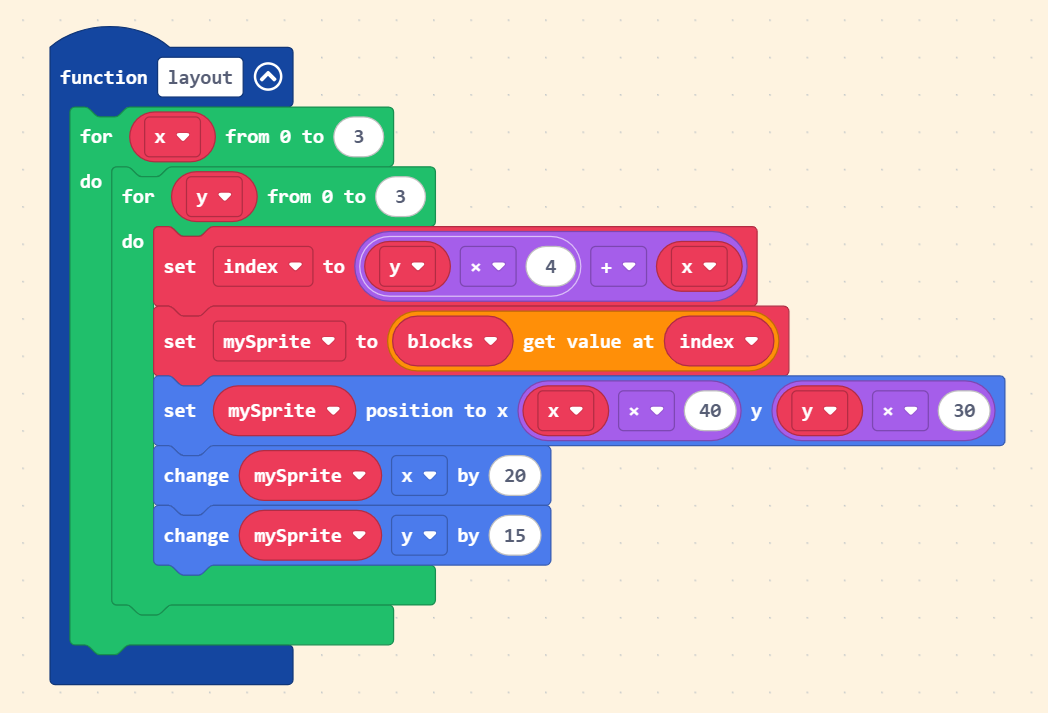
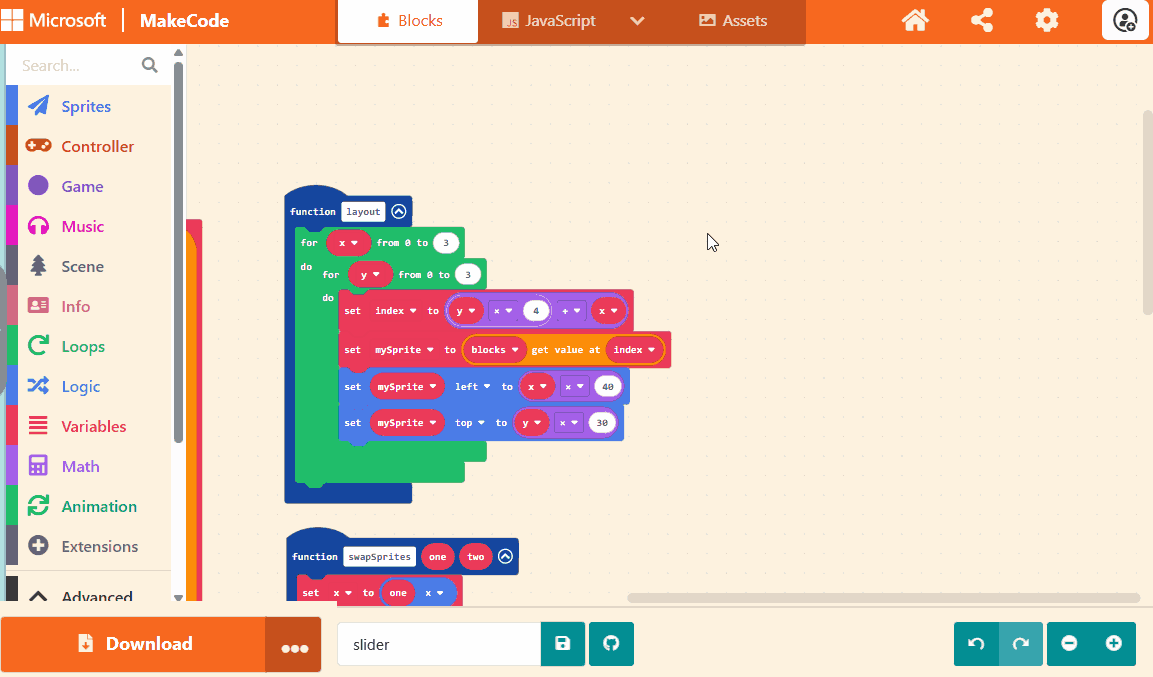
Step 5 - Laying out the blocks
The completed code for this step is available here.
In this step we will correctly position the sprites that are in the blocks array so that
they are spread evenly across the screen. We will do this by creating a new function that will
cycle through each of the sprites in the array in order and position them. This is why the
images assigned to each sprite is important. If the order the images are assigned in the
blocks array is incorrect, the picture will be jumbled up. At the end of this step, your
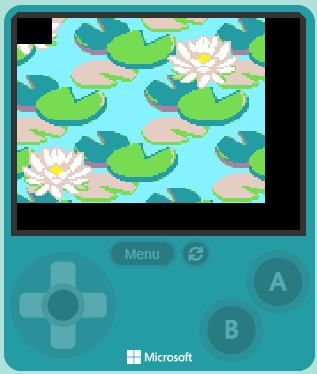
sprites should be positioned correctly like the image below:
![]()
The basic technique for positioning the sprites is to use two loops, one nested inside the
other. The outer loop will represent the horizontal x position counting from 0 to 3 and
the inner loop will represent the vertical y position, also counting from 0 to 3. Using
the pair of x and y coordinates, the correct sprite can be selected from the blocks array
and (later) the position of the sprite can be calculated (remember, each block is 40 pixels wide
by 30 pixels high).
Items in an array are selected using an index value. You can read more about arrays and
indexes here. There are 16 sprites so the index values start at
0 and count up to 15. The formula we will use to calculate the index of the sprite
from the x and y values is: index = (y * 4) + x. The diagram below illustrates the
index for each block of the grid.

Creating the layout function
The code for the layout function to iterate over all the sprites in the blocks array is
shown below. This will not yet position the sprites, we will do that afterwards as there
is some extra code that must be used to correctly position the blocks. The layout function
should be called from the end of the on start section to ensure the blocks are arranged
when the game starts. The completed code is provided after the animated image.
The completed code:

Positioning the sprites
Using the set position block often seems the most obvious option for positioning sprites
and normally this is correct. However, in this case if we use just the set position block
then the sprites will all be slightly out of position as illustrated in the image below:
This is because the sprites use their centre point for their x and y positions, using the
set position block does not quite put the sprite where we expect it to be. We therefore
need to offset the sprites for x and y values by half the width and height of the
sprite. This is shown in the code below:
Step 6 - Moving the blocks
The completed code for this step is available here.
Adding the code to move the blocks is done in three parts.
- Add the
dummysprite toon start - Create the function
swapSpriteswhich switches the sprites - Add the code for the button press events to call the swap code
Add the dummy sprite to on start
The swapSprites function and the move code inside the button press events will
make use of a temporary variable called dummy. The new variable will be created
at the end of the on start block. More details of how dummy is used are provided
in the later sections. The completed code is provided after the animated image.
![]()
The completed code:
Create the swapSprites function
The swapping code will be added in a new function called swapSprites that takes
two arguments one and two which are the sprites to swap. We swap the sprites
x and y positions and also swap the sprites in the blocks array. The reason
for swapping the sprites in the blocks array is so we can check whether the
sprites are in the correct order for a win in a later step; this is also why we
check that the one and two variables are not the dummy variable either.
The dummy variable will be explained further in the move code but it is used
to indicate that a suitable block to swap with was not found. The completed code
is provided after the animated image.
![]()
The completed code:
![]()
Experiment - simplifying the code
There is an optimisation that could be made to the swapSprites function to reduce
the number of blocks of code required. Because the layout function will set the
position of all sprites in the array based on their position, swapSprites could be
implemented by just swapping the position of the sprites in the array and calling
layout. Experiment by changing the code to work this way. Which implementation do
you prefer?
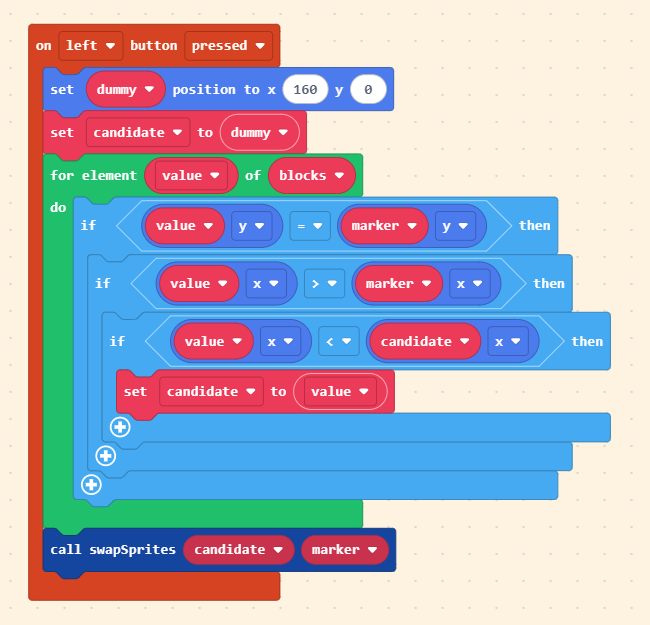
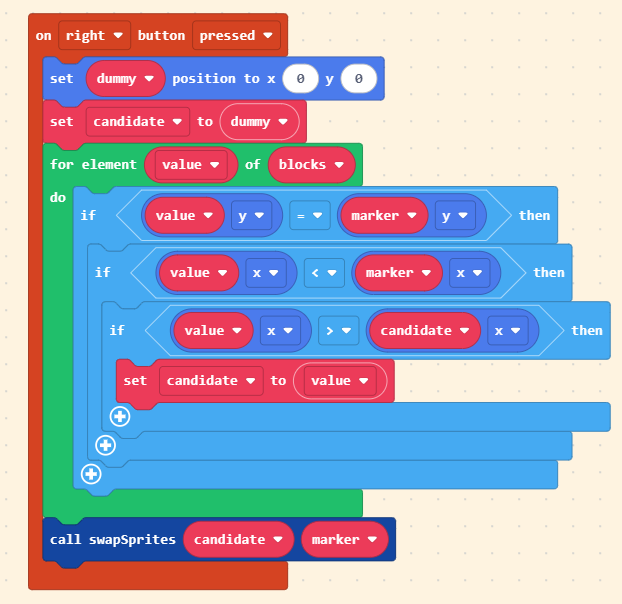
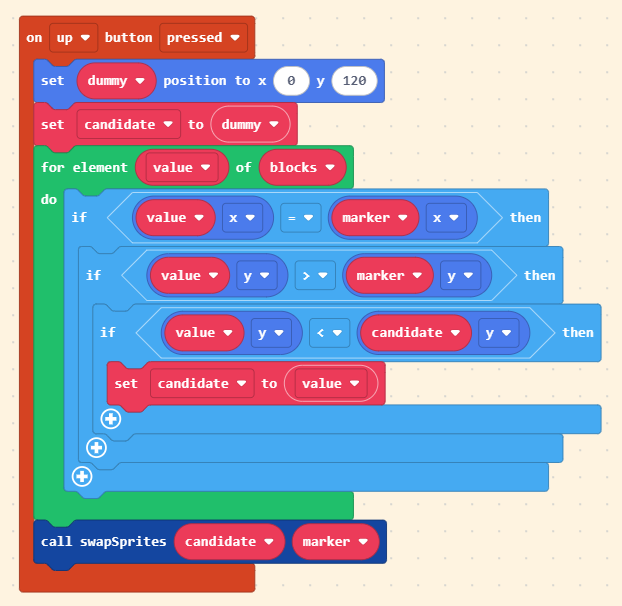
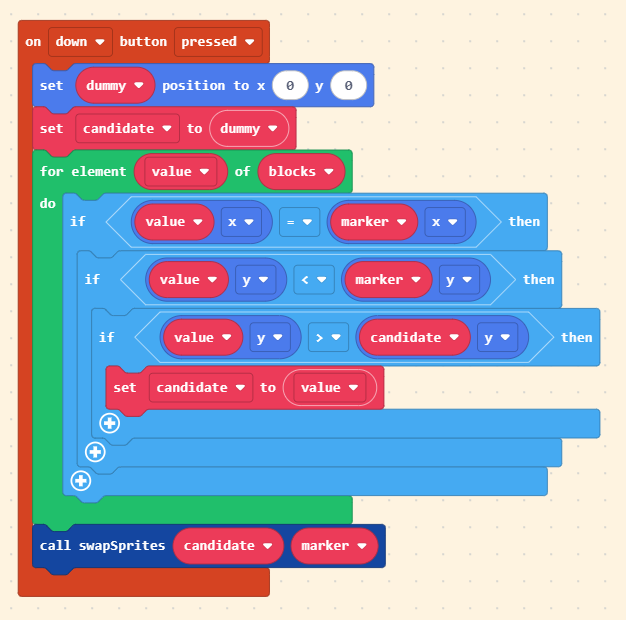
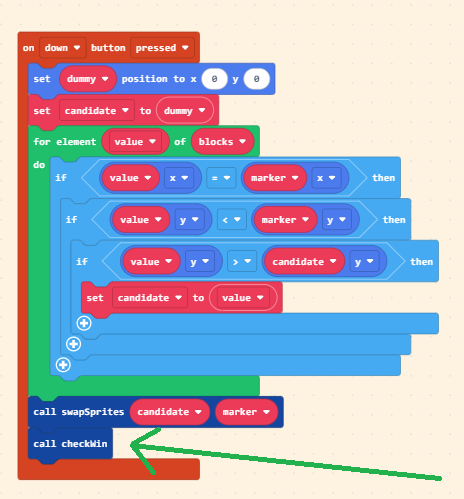
Adding the button press event code
The button press code is very similar (but also slightly different) for each of the
4 movement buttons. The code works by cycling through all of the sprites in the
array looking for the sprite that is to be moved into the space currently occupied by
the marker. It does this by comparing the x and y values against the marker
and the best candidate found so far. The dummy variable is the default value
for candidate and is used to indicate if a suitable sprite block was found or not.
If dummy is passed to swapSprites it will do nothing.
The animated image below shows creating the movement code for the left button only. The code for each of left, right, up and down is provided after the animated image.
Moving left
Moving right
Moving up
Moving down
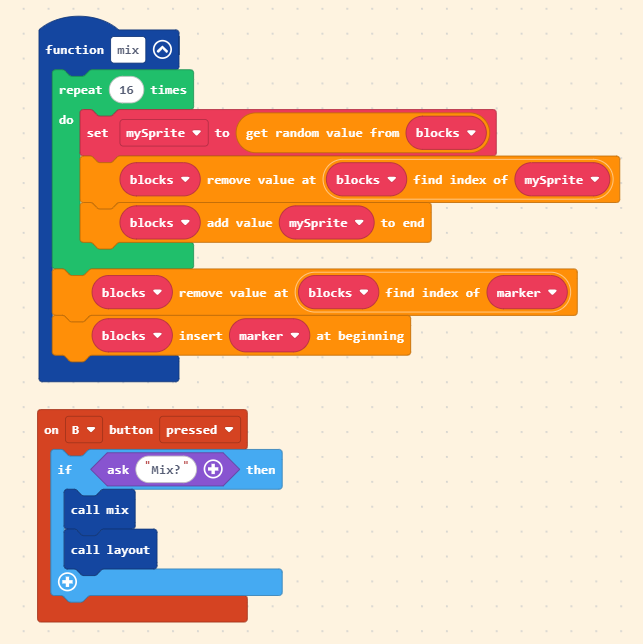
Step 7 - Mixing the blocks
The completed code for this step is available here.
The puzzle game starts off already solved, which is not much of a challenge! We need a way
to mix up the blocks so that the player can solve it. We will do this by creating a function
called mix which loops 16 times, each time selecting a sprite at random and moving it to
the end of the list. This will mix up the order of the sprites in the blocks array. Finally,
the mix function removes the marker sprite and inserts it back as the first element of the
array. This is to ensure the marker sprite is always in the top left after mixing the puzzle.
The B button is used to trigger the mixing code after first asking the player for confirmation.
After mixing the sprites, it calls the layout function to set the position of the sprites
correctly. The completed code is provided after the animated images.
The completed code:
Experiment - Changing the number of loops
The code as it is written loops 16 times to mix up the puzzle. Try using a different number of loops and see what effect this has on the puzzle. Experiment with a range of numbers. Here are some examples to get your started:
- 1
- 2
- 4
- 100
Step 8 - Checking for the puzzle to be solved
The completed code for this step is available here.
When the puzzle is correctly solved, we want to reward the player with a congratulations effect. Checking whether the puzzle has been solved is done in three steps
- Modify the sprites to each have a unique kind
- Create the
checkWinfunction - Call the
checkWinfunction from each of the up, down, left and right button event handlers
Give each sprite a unique kind
In order to be able to check that each sprite is in the exact correct location,
we need an easy way to uniquely identify each sprite. We are going to do this by
giving each sprite a unique kind. By default, MakeCode Arcade has the following
four kinds pre-setup: Player, Enemy, Food and Projectile. We are going to create
kinds one, two through to fifteen. We will then check the order of the sprites
in the array in the checkWin function. Follow the instruction below to change
the kind of the sprites. The completed code is provided after the animated image.
The completed code:
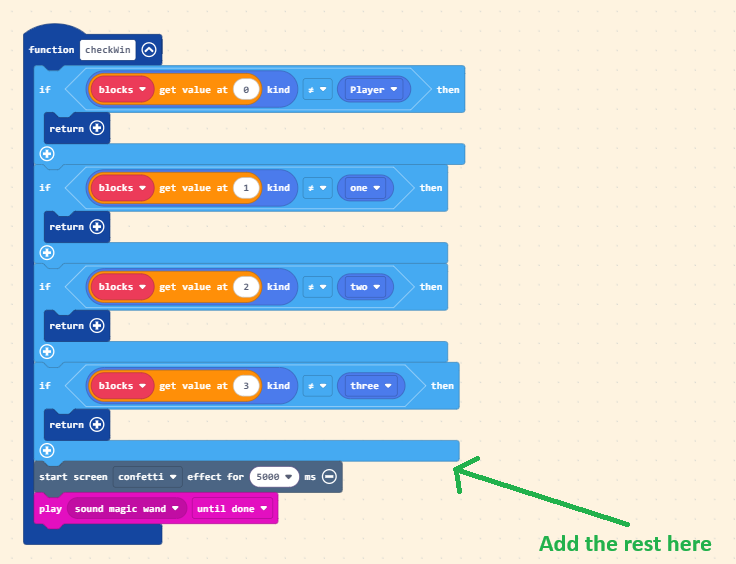
Create the checkWin function
The checkWin function is relatively simple in its structure. It uses a technique
called "early exit" to avoid having a very deeply nested set of if statements.
The function repeats the same check on each of the 16 elements of the blocks
array in turn. If a check fails, the function exits using the return block (the
early exit). Only if all 16 checks are successful does the win code get executed.
The completed code is provided after the animated image.

The completed code:
Call checkWin from each of the button event handlers
The final step is to call the checkWin function from the end of each of the left,
right, up and down button event handlers. The call to checkWin is shown in the down
button handler in the image below:
Extension: Only win if the puzzle has been mixed
With the puzzle solve code added, start a new game but don't mix the puzzle. Move one of the blocks and then move it back to the starting position. What happens?
The solve code should only trigger the win if the puzzle has previously been mixed. Try extending the game so this is the case.
Step 9 - Auto solving the puzzle
The completed code for this step is available here.
Automatically solving the puzzle is quite straight forward because of how the game is
designed. Recall back at step 4 when we first populated the blocks array, we ensured
that the sprites were added in a particular order. Later, we then assigned a unique kind
to each of those sprites. To solve the puzzle, all we have to do is make sure the sprites
are in the correct order in the blocks array and then call layout.
So how do we make sure the sprites are in the correct order? What we are going to do is
search for each of the blocks in order (one, then two, then three etc.), remove it from
the blocks array and then add it back to the end of the blocks array. If we do this
for all 15 blocks we will end up with marker as the first element of the array and then
all of the other sprites in the correct order. Voila!
To find the sprites we want to remove, we will use the array of kind of sprites block.
This returns all sprites of the specified kind. As each of our sprites have a unique
kind, the returned array will only contain a single element at the index 0.
We will then add an event handler for the A button to call a new function 15 times,
once for each of the sprite kinds. We will then call layout. The completed code is
provided after the animated image.
The completed code:
![]()
![]()
Extending the game
Ask the user for confirmation
The code to mix up the puzzle asks the player for confirmation that they wish to do so. Extend you game so that you ask the player if they are sure they want to automatically solve the puzzle.
Challenges
Show the whole picture as a background
When the player solves the puzzle, display the full background image for a few seconds
whilst playing music. To help get you started, you will need to make all the sprites
in the blocks array invisible to show the background and then make them visible again
when ready for the player to start again.
Multiple pictures
The puzzle can be extended even further to offer more than one puzzle to the player to solve. Randomly select a picture from a selection, show the player the picture for a few seconds and then mix it up.